Configuring xbian to access video recordings on a MythTV v 0.25 backend

I have recently set up my Home TV PC environment, using a MythTV server for recording TV and a Raspberry Pi with the xbian-edition of XBMC to play back the content. You can read about it here: Farvel til YouSee tv boks - goddag til MythTV og XBMC på Raspberry Pi - google translation is available in the top-right corner of the page.
This blog entry will show you how to configure xbian (or any of the XBMC-builds currently available for Raspberry Pi - OpenELEC and raspbmc) to access a MythTV v 0.25 backend.
I know of two ways that XBMC aught to be able to access a MythTV backend: MythBox and using the myth:// syntax.
- The MythBox-way of accessing MythTV, I am sure is the way that gives you the nicest-looking and most feature-rich MythTV frontend. But it does not yet support the MythTV protocol that is available in version 0.25 of MythTV. It should work fine with a version 0.24 MythTV backend. So, as of this writing, it is not an option.
- Then there is the more simple myth:// syntax. This is more simple, but it gets the job done in my humble opinion. The XBMC-version that xbian (and raspbmc and OpenELEC for Raspberry Pi) is built on supports the MythTV version 0.25 API for accessing the MythTV backend.
The idea behind the simple myth:// syntax is that it is just another backend video source. Just like you can configure your XBMC to access a NAS, a Windows file server or a Samba share, myth:// is a supported way of accessing video content.
Below I will show you screen dumps from when I added a MythTV backend to my xbian frontend.
But first, I need to point you to an essential resource: the Keyboard page on the xbmc wiki. very handy if you need to configure xbmc.

On the main view, I selcet Video->Files.
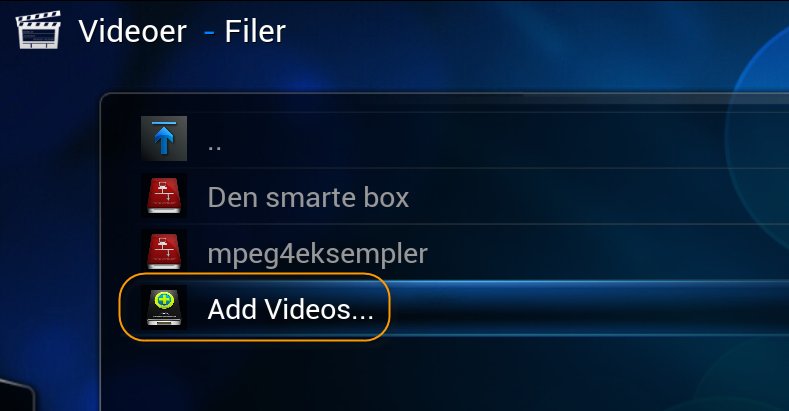
What you see here is my list of configured Video sources - there are two with red icons. What we are about to do is add a third video source.
Selecting Add videos.
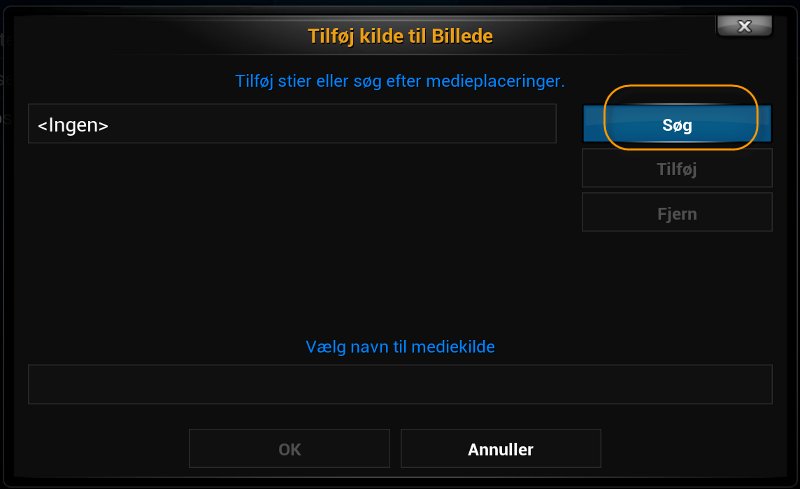
Click Search
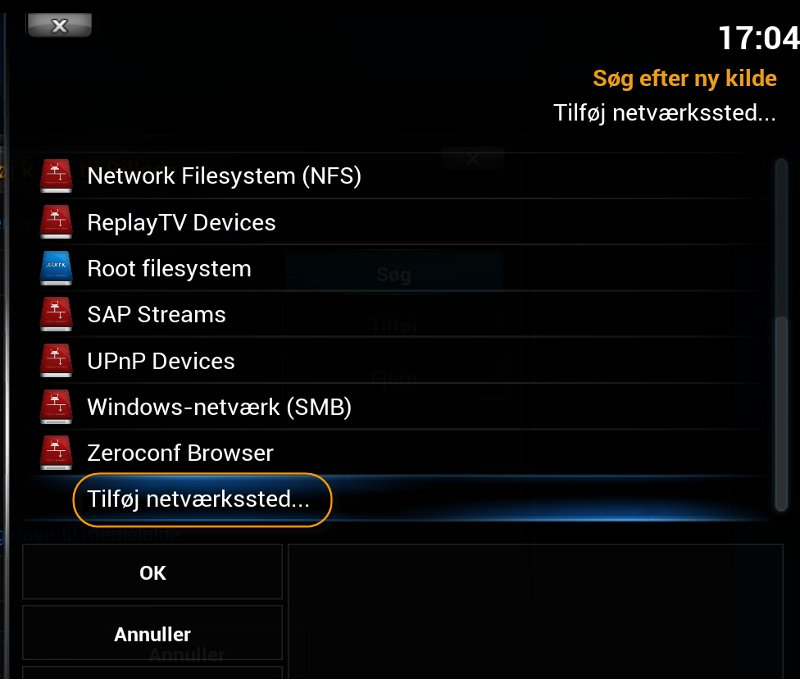
Here we see a list of easily available video sources, like UPnP and Windows networks.
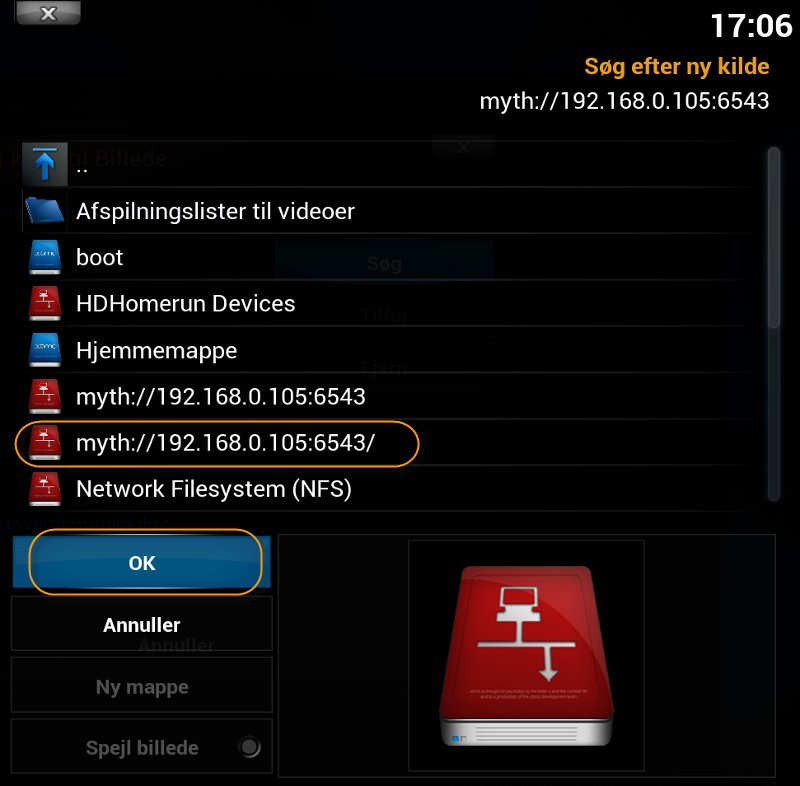
We ignore those and select the bottom option - add network location.
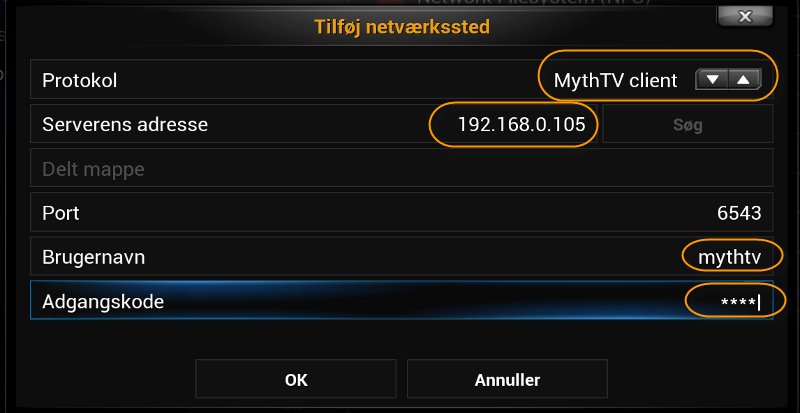
In this box, we need to select MythTv client in the top right corner. This will require a bit of keyboard gymnastics. Get a focus on the area and press ENTER repeatedly to go to the MythTV client option.
Fill in the IP, username and password that come from your MythTV backend server. OK to that.
We are now back in the list of pre-configured video sources, but now a myth:// source has been added. The one you just configured.
Select your new resource and select OK.
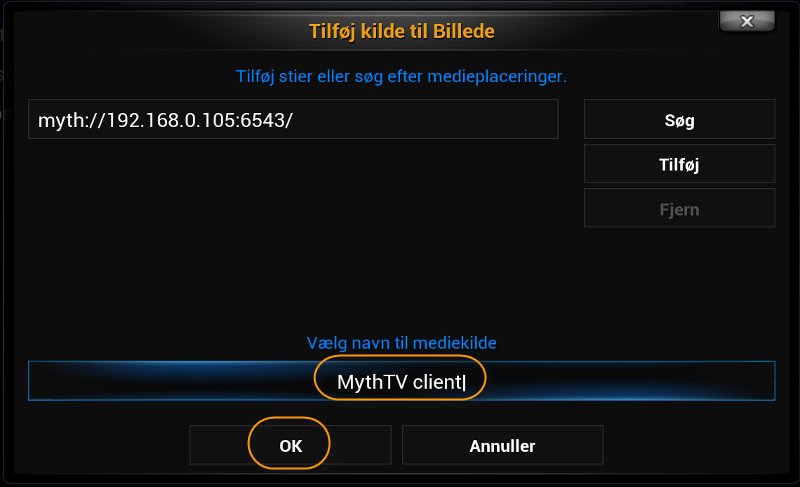
Here you can name the video source. Changing the default name will probably get you a better WAF.
Pressing OK will get you back to the list of your configured video sources. Your new video source will now be available.
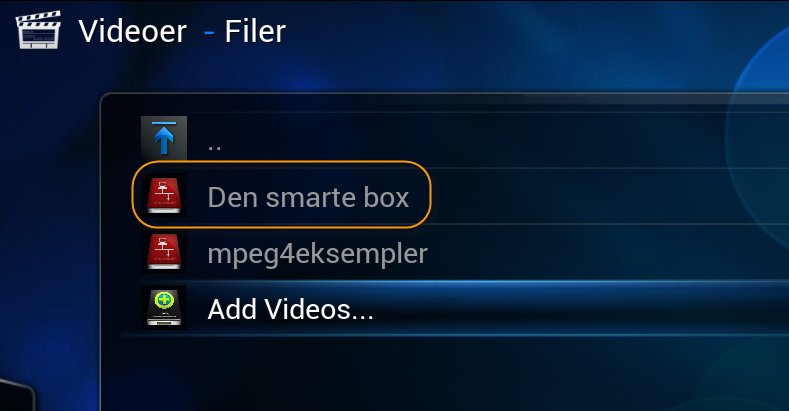
Above I have named my MythTV video source "the clever box". Activating it brings me to the following screen:
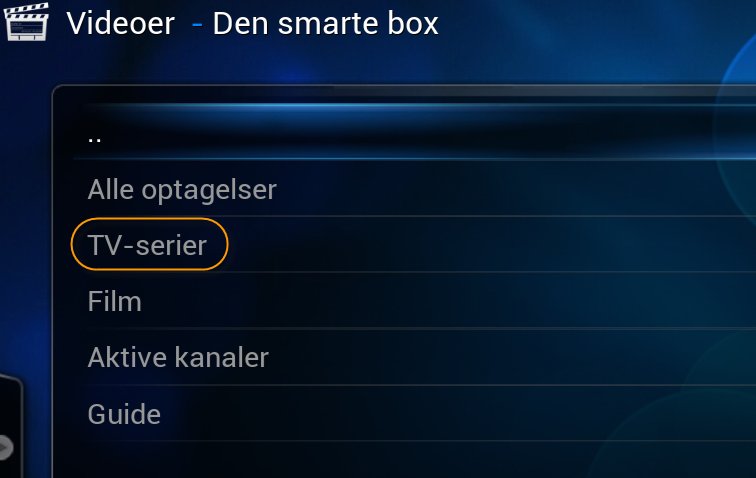
I can choose to see All recordings, just the recorded TV-servies or the recorded Films. I can also choose to have a look at Active channels (what is being displayed on the channels right now), and I can access a TV Guide. The two last options are information only.
So the most used options in my setup are the All recordings, TV-series and Film options.
Below is a screen dump from when I have sellected TV-series.
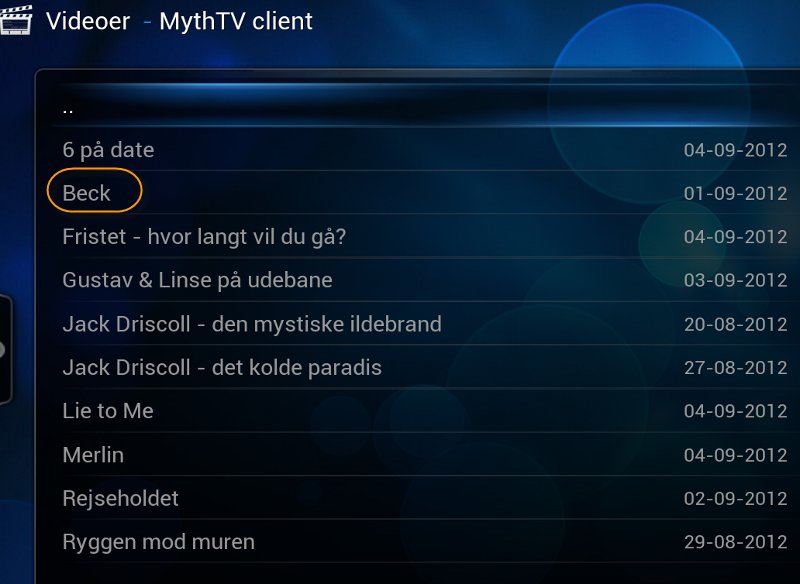
These are "directories" for each series. For instance I record all of the "Beck" crime series. Selecting the directory for Beck brings me to this:
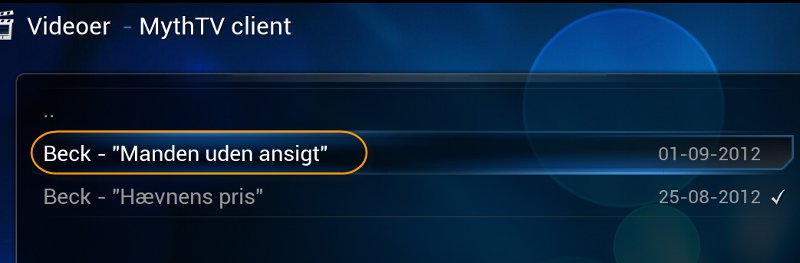
A list of all my recordings of the selected series, one from August 25th and one from September 1st.
Selecting one will start playback.
That's it. Hope this is of use to you.