Blink(1) - controlling the USB light from Java

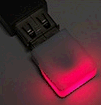
Here is a writeup on how to get a very simple Java program up and running which will make your Blink(1) from thingM turn red.
When you have that working you are ready to do all kinds of interesting stuff.
First off you need to download blink1-java-processing.zip from the thingM downloads list.
Unzip it. I did this to C:\blink1\
Now launch you Eclipse IDE.
Create a new Java Project
Make sure that the project uses a 32-bit JVM. Not 64-bit.
File Import->File system
C:\blink1\blink1-java-processing-lib (1)\blink1\library
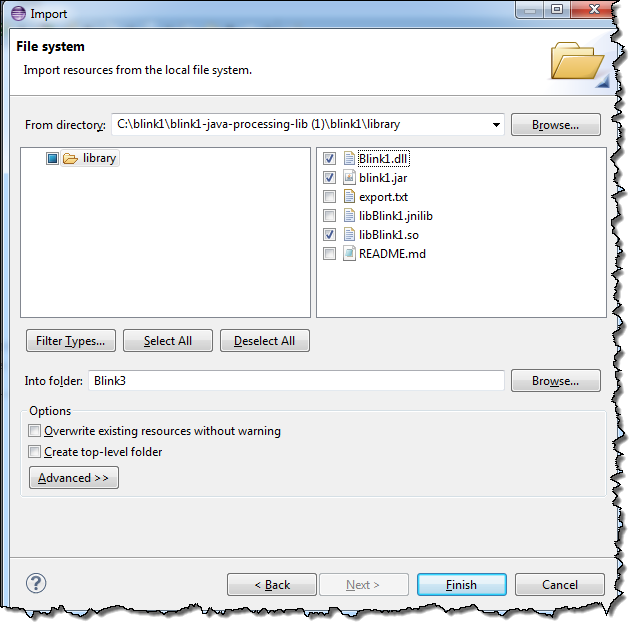
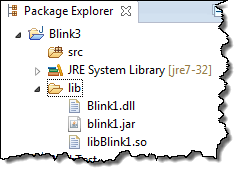
Create a lib folder right under the project name and drag the three files to the folder.
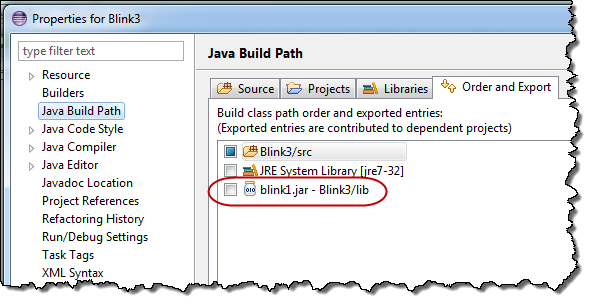
Right-click blink1.jar and do like this:
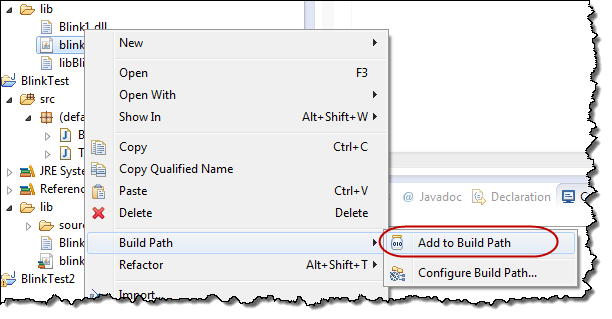
Doing this will add this to your Projetc's properties:
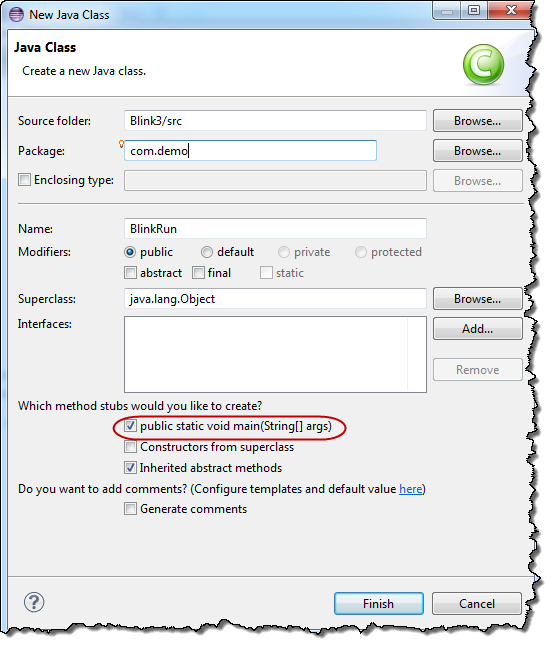
Create a new class.
Give it a name, checkmark to create a public static void main:
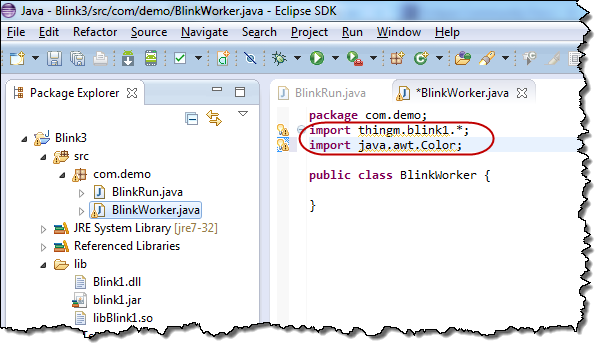
Create a second Class. I call it BlinkWorker.
Import thingm.blink1.* to get access to Blink code and java.awt.Color to be able to work with colours:
Create a method in the class like this:
public void setColourRed() {
            Blink1 blink1Worker = new Blink1();
            blink1Worker.open();
            blink1Worker.setRGB(Color.RED);
            blink1Worker.close();
    }
This method will set the colour of your blink(1) to red.
Now go back to the class you created first, and in the main add these two lines:
BlinkWorker blinkworker = new BlinkWorker();
blinkworker.setColourRed();
If you now click the Run button (which will launch the main), you will see an error. Here is what it looks like in my environment:
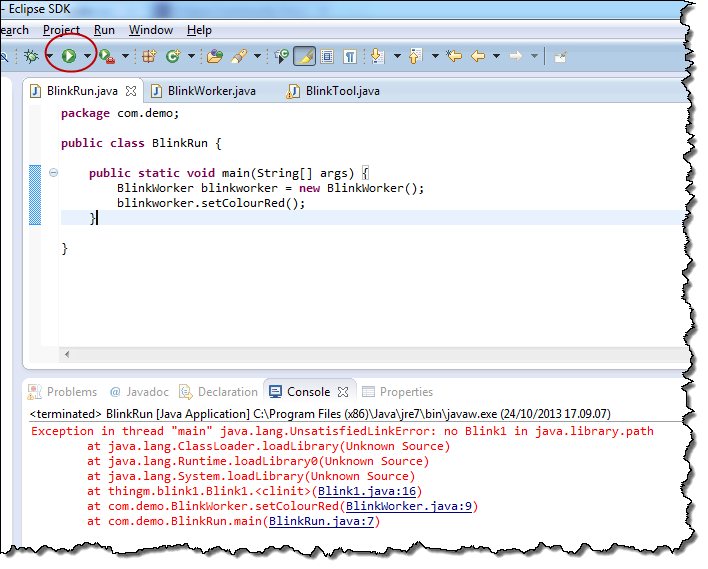
This is because the Java code in the file called blink1.jar is unable to find the OS native resource file (Blink1.dll on windows and libBlink1.so on Linux).
Here is a fix for that that works while you are running this inside the Eclipse IDE.
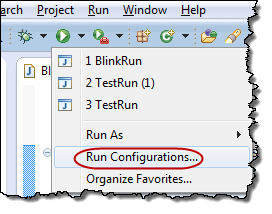
Click the down-arrow next to the run button And select Run configurations:
Find Java Applications in the left hand side, left-click your Run configuration (Mine is called BlinkRun because that is the name of the class i created first).
And then add the string that you can see in this screen dump.

Note the that the project name should be part of the string. And also note how it says "lib" which is the name of the folder in which the dll and so file are located.
This tells the JVM that (at run time) it should look in this folder for any resource files needed.
Remember though - this is only something that works while we are still running this from inside Eclipse.
Now press the Run button again.
If you have your Blink(1) inserted in a USB port it will light up in red.